How to Block Malicious WordPress Login Attempts with .htaccess
Let’s face it, WordPress is great, but it’s also the widest used open-source content management system with over 60 millions sites. Day in and day out, WordPress sites are hacked. Why? Basic security protocols are not being followed. While there are hundreds of articles about how to tighten up security, I’m going to share one tip I use on all my sites. I like to call it a login lock down wall. That’s not the technical term, but it’s more fun to say!
How You Can Stop Malicious WordPress Logins
If you have plugins like Wordfence or Sucuri, then you might get notifications when someone is trying to brute force their way into your blog. One my personal finance site, I used to get nearly 200 a day. That was a lot of emails.
Since I don’t allow people to register on my sites, I figured it was time to get serious about these scammers and how they approach my sites. It took me all of about 5 minutes and I was done! Here are the steps to lock down your login page (domain.com/wp-login.php). We are going to be doing this with .htaccess and password protecting the wp-login.php file.
Step 1: Check your hosting
Make sure you have a host that uses cPanel (this is just what I’m using right now) and that it’s on Apache. Most shared hosting plans are running on Apache, such as BlueHost, HostGator, and SiteGround.
You can do this with FTP as long as you have access to the root directory in your file management system. You need to log into your platform (easiest via cPanel) and go to the File Manager. When in there, make sure you click on the check box that says “Show Hidden Files.” Go t0 the home directory and see if you already have a .wpadmin file in your install. If you do, then select and click the edit button.
Step 2: Back Up Your Site
I can’t stress this enough, especially for those who don’t or haven’t messed with .htaccess files. Please back up your site first. If you don’t have a backup service, I offer one for $5 per month. Contact me for more details.
Step 3: Create a .wpadmin file
You can really call this whatever you want, but wpadmin is OK with me. Make sure you include the period before the name. That’s very important.
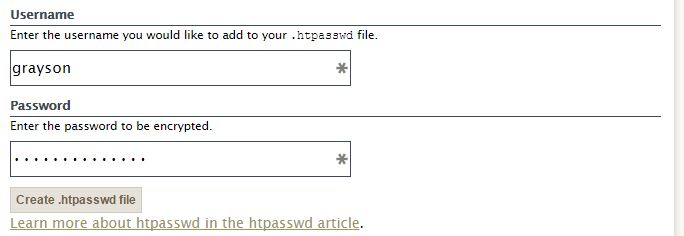
This file is only going to contain one line with a username and encrypted password. Open your favorite text editor and work through these steps.
-
- Head over to this site to create a username/password combination. Make sure you keep a note of this information as you will need it to log in. Also make sure you use a nice and secure password. Try the LastPass password generator for this.
-
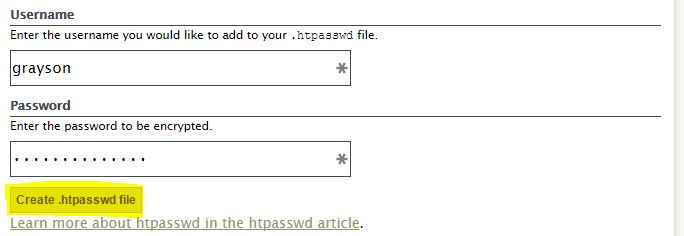
- Click the “create .htpasswd file” button
-
- Take what the generator created and put it in your .wpadmin file you are creating in the text editor.
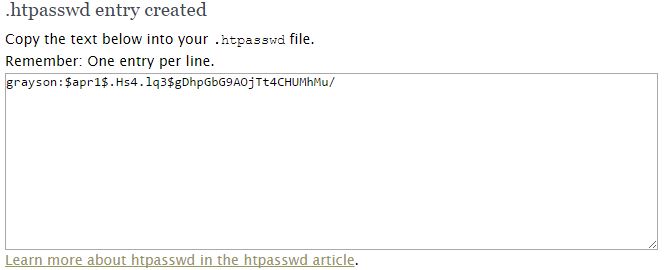
- Save the .wpadmin file as a text file with UTF-8 encoding.
Step 4: Upload your .wpadmin file to the server
You will need to go into cPanel as directed above and have to upload the file you just created. There is a menu link in the File Manager in order to upload a file. Click that and select the .wpadmin file you just created on your computer.
Step 5: Edit your .htaccess file
Go into your public_html folder and find your .htaccess file. Click to edit this file. You will then need to include this code into the top of your .htaccess file.
ErrorDocument 401 "Unauthorized Access"
ErrorDocument 403 "Forbidden"
<FilesMatch "wp-login.php">
AuthName "Authorized Only"
AuthType Basic
AuthUserFile /home/username/.wpadmin
require valid-user
</FilesMatch>
You will see in the section that says AuthUserFile, you will need to change this to the path on your server. Most of the time it’s home/then your username/filename. You can see this path when you’re in the File Manager on cPanel.
Once you add that code, click save. Now it’s time to check.
Open a new browser window and navigate to your site. When there, append the /wp-login.php to the URL. This is your login URL. Even if you use domain.com/wp-admin/, it still redirects to wp-login.php, so you don’t even have to go to that page.
When you click enter, there should be a little pop up box that appears. This is where you will put in your username and password you created up above. If you do it right, it will then load the wp-login.php page like normal. You can then use your regular WordPress login.
**Important Caveat**
If you have multiple domains in one account, such as add-on domains, this will lock them all down with the same username and password. If you don’t want it on all the wp-login.php pages in your account, then change the following line:
<FilesMatch "wp-login.php">
to:
<FilesMatch "/home/username/public_html/wp-login.php">
This will just put this up on the main domain in your hosting account. It won’t pull it up on other WordPress installations in sub-folders. Make sure you change the path to fit what you hosting path actually is.
I’ve set this system up on a number of blogs. It’s a little strange to get used to, but it works and works well. I have clients asking me for this setup often and it’s pretty easy if you know what you’re doing. If you don’t feel confident in making this change or having any questions, contact me for a quote for this service or with your questions.
Hi Grayson,
This may be dumb but it seems like I’ve tried everything and still getting those emails which are annoying and scary. Will this block almost all of those “attempts” and stop lighting up my email notifications? Thank you.
Yes, this should do it. Have you tried renaming your login page by chance?